liuhao163.github.io

杂七杂八


  • Home

  • Categories

  • Tags

  • Archives

  • Sitemap

SpringMvc源码-DispatcherServlet(一)

Posted on 2020-03-21 | Edited on 2022-09-21 | In java , spring , mvc

DispatcherServlet是springmvc最重要的组成部分,听名字就知道它负责一个请求到响应的流转,本篇主要讲DispatcherServlet的启动过程。
思考一个把问题?为什么DispatcherServlet初始化后,Spring的Ioc容器就会启动,容器中的Bean是什么时候注册到容器中的?

实际上整个SpringMvc的启动过程分为俩个阶段:

  1. ContextLoaderListener初始化,实例化IOC容器,并将此容器注册到ServletContext中。
  2. DispatcherServlet初始化,建立自己的上下文,也注册到ServletContext中。

    见下面这段web.xml的配置(springboot不在我们这篇文章讨论之列。)

1
2
3
4
5
6
7
8
9
10
11
12
13
14
15
16
17
18
19
20
21
22
23
24
25
26
27
28
29
30
31
32
33
34
35
36
37
38
39
40
41
42
43
44
45
46
47
<web-app xmlns="http://xmlns.jcp.org/xml/ns/javaee"
xmlns:xsi="http://www.w3.org/2001/XMLSchema-instance"
xsi:schemaLocation="http://xmlns.jcp.org/xml/ns/javaee
http://xmlns.jcp.org/xml/ns/javaee/web-app_3_1.xsd"
version="3.1">

<display-name>ota</display-name>
<description>ota web application</description>

<!-- 系统组件加载顺序:context-param -> listener -> filter -> servlet -->
<context-param>
<param-name>contextConfigLocation</param-name>
<param-value>classpath:/applicationContext.xml</param-value>
</context-param>

<listener>
<listener-class>org.springframework.web.context.ContextLoaderListener</listener-class>
</listener>

<!-- GZip -->
<filter>
<filter-name>gzipFilter</filter-name>
<filter-class>com.travelsky.ibeplus.compress.Compress2WayFilter</filter-class>
</filter>
<filter-mapping>
<filter-name>gzipFilter</filter-name>
<url-pattern>/*</url-pattern>
</filter-mapping>

<!-- Servlet that dispatches request to registered handlers (Controller implementations). -->
<servlet>
<servlet-name>ota</servlet-name>
<servlet-class>org.springframework.web.servlet.DispatcherServlet</servlet-class>
<init-param>
<param-name>contextConfigLocation</param-name>
<param-value>classpath:spring/mvc-core-config.xml</param-value>
</init-param>
<load-on-startup>1</load-on-startup>
</servlet>

<!-- 需要定义在对应的servlet之后 -->
<servlet-mapping>
<servlet-name>ota</servlet-name>
<url-pattern>/</url-pattern>
</servlet-mapping>

</web-app>

ContextLoaderListener初始化

见web.xml这一段

1
2
3
4
5
6
7
8
 <context-param>
<param-name>contextConfigLocation</param-name>
<param-value>classpath:/applicationContext.xml</param-value>
</context-param>

<listener>
<listener-class>org.springframework.web.context.ContextLoaderListener</listener-class>
</listener>

关键逻辑:
ContextLoaderListener采用了很典型的适配器模式,继承了ContextLoader,实现了ServletContextListener接口。
在contextInitialized()->initWebApplicationContext()

1
2
3
4
5
6
7
8
9
10
11
12
13
14
15
16
17
18
19
20
21
22
23
24
25
26
27
28
29
30
31
32
33
34
35
36
37
38
39
40
41
42
43
44
45

public WebApplicationContext initWebApplicationContext(ServletContext servletContext) {
......

try {
// Store context in local instance variable, to guarantee that
// it is available on ServletContext shutdown. 初始化webApplication
......
if (this.context == null) {
this.context = createWebApplicationContext(servletContext);
}
if (this.context instanceof ConfigurableWebApplicationContext) {
ConfigurableWebApplicationContext cwac = (ConfigurableWebApplicationContext) this.context;
if (!cwac.isActive()) {
// The context has not yet been refreshed -> provide services such as
// setting the parent context, setting the application context id, etc
if (cwac.getParent() == null) {
// The context instance was injected without an explicit parent ->
// determine parent for root web application context, if any.
ApplicationContext parent = loadParentContext(servletContext);
cwac.setParent(parent);
}
// 该方法会调用setConfigLocation,将xml中的contextConfigLocation传递给WebApplicationContext,还会调用refresh方法执行容器的bean初始化等操作
configureAndRefreshWebApplicationContext(cwac, servletContext);
}
}
//将ConfigurableWebApplicationContext设置会servletContext
servletContext.setAttribute(WebApplicationContext.ROOT_WEB_APPLICATION_CONTEXT_ATTRIBUTE, this.context);

ClassLoader ccl = Thread.currentThread().getContextClassLoader();
if (ccl == ContextLoader.class.getClassLoader()) {
currentContext = this.context;
}
else if (ccl != null) {
currentContextPerThread.put(ccl, this.context);
}

......
return this.context;
} catch (RuntimeException | Error ex) {
logger.error("Context initialization failed", ex);
servletContext.setAttribute(WebApplicationContext.ROOT_WEB_APPLICATION_CONTEXT_ATTRIBUTE, ex);
throw ex;
}
}

configureAndRefreshWebApplicationContext方法

1
2
3
4
5
6
7
8
9
10
11
12
13
14
15
16
17
18
19
20
21
22
23
24
25
26
27
28
29
30
31
32
33
34
35
protected void configureAndRefreshWebApplicationContext(ConfigurableWebApplicationContext wac, ServletContext sc) {
//关键1
if (ObjectUtils.identityToString(wac).equals(wac.getId())) {
// The application context id is still set to its original default value
// -> assign a more useful id based on available information
String idParam = sc.getInitParameter(CONTEXT_ID_PARAM);
if (idParam != null) {
wac.setId(idParam);
}
else {
// Generate default id...
wac.setId(ConfigurableWebApplicationContext.APPLICATION_CONTEXT_ID_PREFIX +
ObjectUtils.getDisplayString(sc.getContextPath()));
}
}

//关键2 设置servletContext 和web.xml的configLocationParam 传给 ConfigurableWebApplicationContext
wac.setServletContext(getServletContext());
String configLocationParam = sc.getInitParameter(CONFIG_LOCATION_PARAM);
if (configLocationParam != null) {
wac.setConfigLocation(configLocationParam);
}

// The wac environment's #initPropertySources will be called in any case when the context
// is refreshed; do it eagerly here to ensure servlet property sources are in place for
// use in any post-processing or initialization that occurs below prior to #refresh
ConfigurableEnvironment env = wac.getEnvironment();
if (env instanceof ConfigurableWebEnvironment) {
((ConfigurableWebEnvironment) env).initPropertySources(sc, null);
}

customizeContext(sc, wac);
//关键3 见ApplicationContext.refresh方法 初始化容器的bean
wac.refresh();
}

DispatcherServlet初始化

相关的xml配置

1
2
3
4
5
6
7
8
9
10
11
12
13
14
15
16
<!--  Servlet that dispatches request to registered handlers (Controller implementations).  -->
<servlet>
<servlet-name>ota</servlet-name>
<servlet-class>org.springframework.web.servlet.DispatcherServlet</servlet-class>
<init-param>
<param-name>contextConfigLocation</param-name>
<param-value>classpath:spring/mvc-core-config.xml</param-value>
</init-param>
<load-on-startup>1</load-on-startup>
</servlet>

<!-- 需要定义在对应的servlet之后 -->
<servlet-mapping>
<servlet-name>ota</servlet-name>
<url-pattern>/</url-pattern>
</servlet-mapping>

类的继承关系:DispatcherServlet–>FrameworkServlet–>HttpServletBean–>HttpServlet

HttpServletBean重写了Serlvet的init方法,封装了spring的web容器启动的过程。

HttpServletBean

init()方法

1
2
3
4
5
6
7
8
9
10
11
12
13
14
15
16
17
18
19
20
21
22
23
24
25
26
27
28
29
30
31
32
33
34
35
/**
* Map config parameters onto bean properties of this servlet, and
* invoke subclass initialization.
* @throws ServletException if bean properties are invalid (or required
* properties are missing), or if subclass initialization fails.
*/
@Override
public final void init() throws ServletException {

// Set bean properties from init parameters.
//1. 获取web.xml中的getInitParameterNames,将servletConfig的initParam参数的key和value都保存到pvs中
PropertyValues pvs = new ServletConfigPropertyValues(getServletConfig(), this.requiredProperties);
if (!pvs.isEmpty()) {
try {
//BeanWrapper实际是BeanWrapperImpl【DispatcherServlet】
BeanWrapper bw = PropertyAccessorFactory.forBeanPropertyAccess(this);
ResourceLoader resourceLoader = new ServletContextResourceLoader(getServletContext());
bw.registerCustomEditor(Resource.class, new ResourceEditor(resourceLoader, getEnvironment()));
initBeanWrapper(bw);
//通过BeanWrapper为bean【DispatcherServlet】赋值
//BeanWrapper的target的属性的key要和web.xml中的<init-param>的param-name相等,这里就给DispatchServlet的contextConfigLocation赋值了
bw.setPropertyValues(pvs, true);
}
catch (BeansException ex) {
if (logger.isErrorEnabled()) {
logger.error("Failed to set bean properties on servlet '" + getServletName() + "'", ex);
}
throw ex;
}
}

// Let subclasses do whatever initialization they like.
// FrameworkServlet实现了initServletBean方法
initServletBean();
}

FrameworkServlet

FrameworkServlet的Override了HttpServletBean的initServletBean方法,在该方法通过initWebApplicationContext初始化了webApplicationContext

1
2
3
4
5
6
7
8
9
10
11
12
13
14
15
16
17
18
19
20
21
22
23
24
25
26
27
28
29
30
31
32
33
34
/**
* Overridden method of {@link HttpServletBean}, invoked after any bean properties
* have been set. Creates this servlet's WebApplicationContext.
*/
@Override
protected final void initServletBean() throws ServletException {
getServletContext().log("Initializing Spring " + getClass().getSimpleName() + " '" + getServletName() + "'");
if (logger.isInfoEnabled()) {
logger.info("Initializing Servlet '" + getServletName() + "'");
}
long startTime = System.currentTimeMillis();

try {
//关键方法 在这里初始化了 webApplicationContext
this.webApplicationContext = initWebApplicationContext();
initFrameworkServlet();
}
catch (ServletException | RuntimeException ex) {
logger.error("Context initialization failed", ex);
throw ex;
}

if (logger.isDebugEnabled()) {
String value = this.enableLoggingRequestDetails ?
"shown which may lead to unsafe logging of potentially sensitive data" :
"masked to prevent unsafe logging of potentially sensitive data";
logger.debug("enableLoggingRequestDetails='" + this.enableLoggingRequestDetails +
"': request parameters and headers will be " + value);
}

if (logger.isInfoEnabled()) {
logger.info("Completed initialization in " + (System.currentTimeMillis() - startTime) + " ms");
}
}

FrameworkServlet.initWebApplicationContext()

1
2
3
4
5
6
7
8
9
10
11
12
13
14
15
16
17
18
19
20
21
22
23
24
25
26
27
28
29
30
31
32
33
34
35
36
37
38
39
40
41
42
43
44
45
46
47
protected WebApplicationContext initWebApplicationContext() {
//ContextLoaderListerner中已经将context放在了ROOT_WEB_APPLICATION_CONTEXT_ATTRIBUTE
WebApplicationContext rootContext =
WebApplicationContextUtils.getWebApplicationContext(getServletContext());
WebApplicationContext wac = null;

//以下是初始化webApplicationContext的过程
if (this.webApplicationContext != null) {
// A context instance was injected at construction time -> use it
wac = this.webApplicationContext;
if (wac instanceof ConfigurableWebApplicationContext) {
ConfigurableWebApplicationContext cwac = (ConfigurableWebApplicationContext) wac;
if (!cwac.isActive()) {
// The context has not yet been refreshed -> provide services such as
// setting the parent context, setting the application context id, etc
if (cwac.getParent() == null) {
// The context instance was injected without an explicit parent -> set
// the root application context (if any; may be null) as the parent
cwac.setParent(rootContext);
}
//关键方法
configureAndRefreshWebApplicationContext(cwac);
}
}
}
if (wac == null) {
wac = findWebApplicationContext();
}
if (wac == null) {
//关键方法 上面如果为空,createWebApplicationContext里会在执行configureAndRefreshWebApplicationContext
wac = createWebApplicationContext(rootContext);
}

if (!this.refreshEventReceived) {
synchronized (this.onRefreshMonitor) {
// DispatcherServlet实现了onRefresh-->即:initStrategies(context);
onRefresh(wac);
}
}

if (this.publishContext) {
String attrName = getServletContextAttributeName();
getServletContext().setAttribute(attrName, wac);
}

return wac;
}

重点方法,FrameworkServlet.configureAndRefreshWebApplicationContext(),初始化ConfigurableWebApplicationContext并且执行refresh。

1
2
3
4
5
6
7
8
9
10
11
12
13
14
15
16
17
18
19
20
21
22
23
24
25
26
27
28
29
30
31
32
33
34
35
36
37

protected void configureAndRefreshWebApplicationContext(ConfigurableWebApplicationContext wac) {
if (ObjectUtils.identityToString(wac).equals(wac.getId())) {
// The application context id is still set to its original default value
// -> assign a more useful id based on available information
if (this.contextId != null) {
wac.setId(this.contextId);
}
else {
// Generate default id...
wac.setId(ConfigurableWebApplicationContext.APPLICATION_CONTEXT_ID_PREFIX +
ObjectUtils.getDisplayString(getServletContext().getContextPath()) + '/' + getServletName());
}
}

wac.setServletContext(getServletContext());
wac.setServletConfig(getServletConfig());
wac.setNamespace(getNamespace());
//将ContextRefreshListener注册到ApplicationContext中
//在调用wac.refresh时候会回触发spring框架中的的onApplicationEventContext
// SourceFilteringListener.onApplicationEventContext-->RefreshListener.onApplicationEvent-->FrameworkServlet.this.onApplicationEvent-->DipatcherServlet.onRefresh
wac.addApplicationListener(new SourceFilteringListener(wac, new ContextRefreshListener()));
// The wac environment's #initPropertySources will be called in any case when the context
// is refreshed; do it eagerly here to ensure servlet property sources are in place for
// use in any post-processing or initialization that occurs below prior to #refresh
ConfigurableEnvironment env = wac.getEnvironment();
if (env instanceof ConfigurableWebEnvironment) {
((ConfigurableWebEnvironment) env).initPropertySources(getServletContext(), getServletConfig());
}

postProcessWebApplicationContext(wac);
applyInitializers(wac);

//applicationContext.refresh()-->registerListener会触发ContextRefreshListener.onApplicationEvent
wac.refresh();
}

DispatcheServlet

重点方法onRefresh:逻辑见下图,重点方法initStrategies。组件的优先级:自己注入的Bean>DespatchServlet.properties中的Bean

1
2
3
4
5
6
7
8
9
10
11
12
13
14
15
16
17
18
19
20
21
22
23
24
25
26
27
28
29
30
@Override
protected void onRefresh(ApplicationContext context) {
initStrategies(context);
}

/**
* Initialize the strategy objects that this servlet uses.
* <p>May be overridden in subclasses in order to initialize further strategy objects.
* 初始化组件
*/
protected void initStrategies(ApplicationContext context) {
//MultipartResolver,不注册不支持上传文件,默认是StandardServletMultipartResolver,需要自己注册
initMultipartResolver(context);
//i18n 默认调用getDefaultStrategy(),见:DispatchServlet.properties,org.springframework.web.servlet.i18n.AcceptHeaderLocaleResolver
initLocaleResolver(context);
//主题 默认调用getDefaultStrategy(),见:DispatchServlet.properties,org.springframework.web.servlet.theme.FixedThemeResolver
initThemeResolver(context);
//重要组件,detectAllHandlerMappings?从context包含父类取所有的HandlerMapping or 取一个,为空从DispatchServlet.properties
initHandlerMappings(context);
//重要组件,detectAllHandlerMappings?从context包含父类取所有的HandlerAdapter or 取一个,为空从DispatchServlet.properties
initHandlerAdapters(context);
//异常处理,同上类似的逻辑
initHandlerExceptionResolvers(context);
//Request->ViewName
initRequestToViewNameTranslator(context);
//ViewResolver
initViewResolvers(context);
//flashMapManager
initFlashMapManager(context);
}

总结

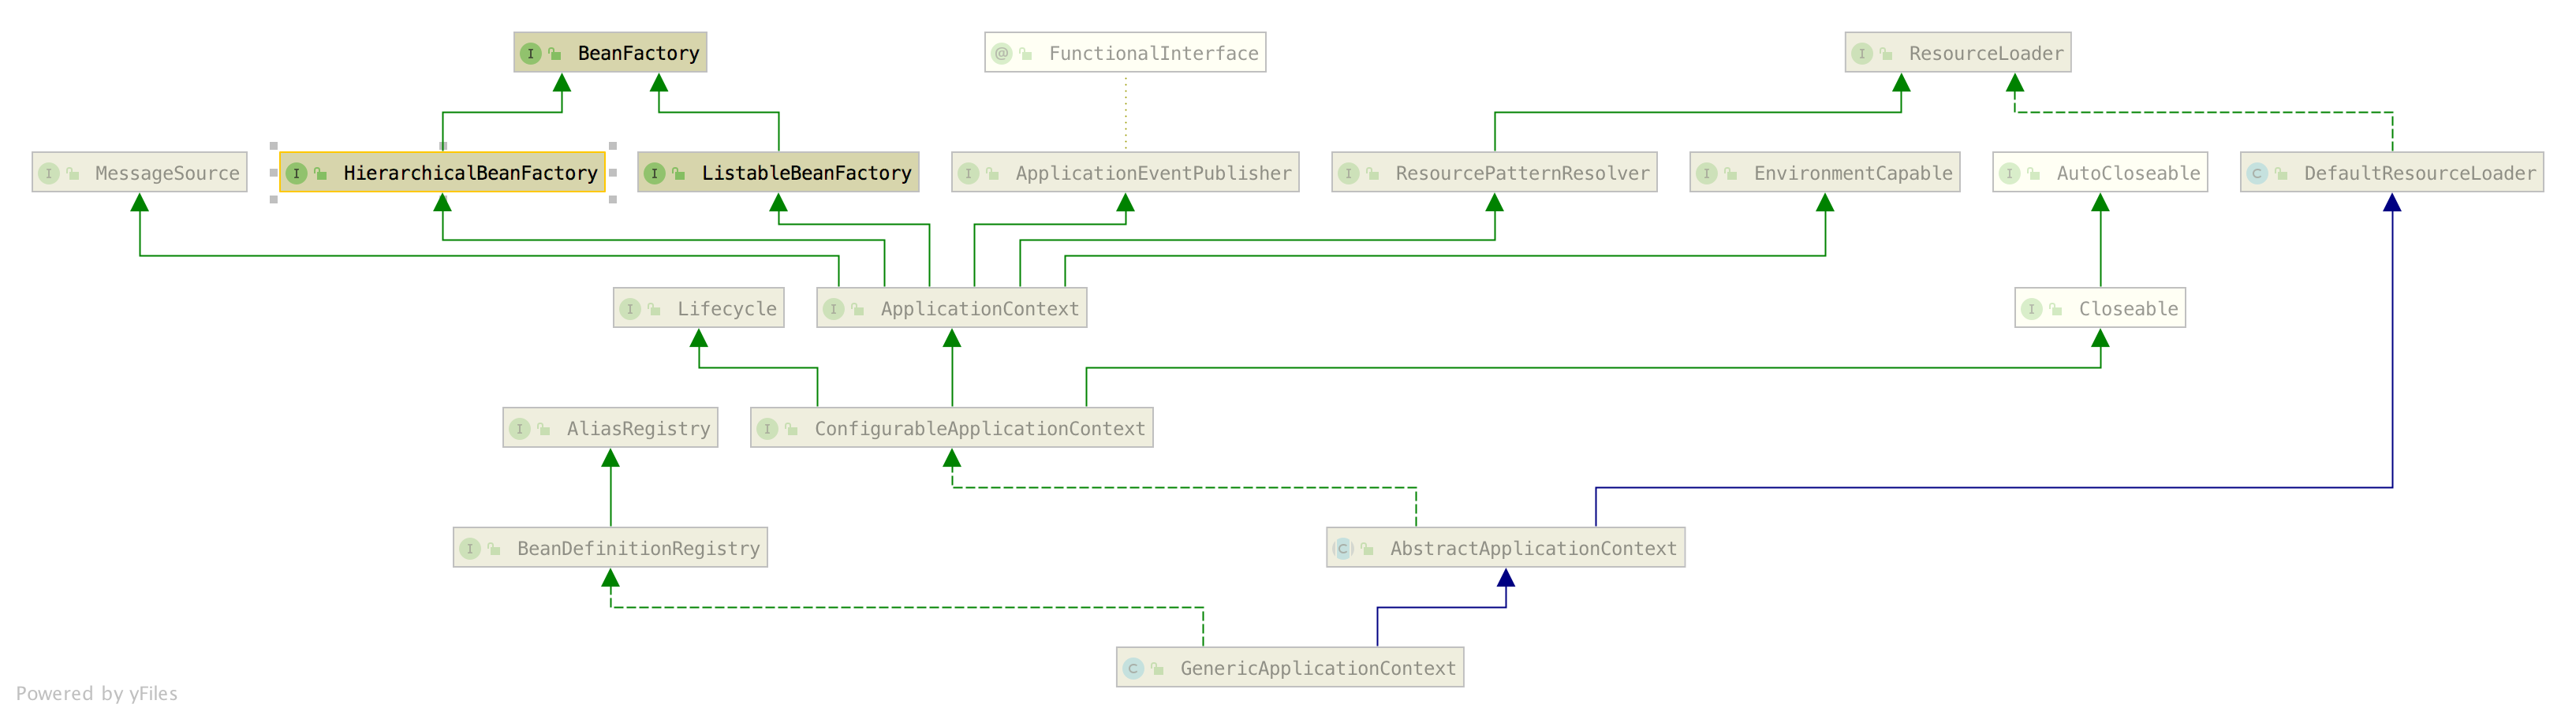
这里的context默认是XmlWebApplicationContext,见contextLoader

1
2
3
4
5
6
7
8
9
10
11
12
13
14
15
16
//文件内容:org.springframework.web.context.WebApplicationContext=org.springframework.web.context.support.XmlWebApplicationContext
private static final String DEFAULT_STRATEGIES_PATH = "ContextLoader.properties";

//静态方法代码块
static {
// Load default strategy implementations from properties file.
// This is currently strictly internal and not meant to be customized
// by application developers.
try {
ClassPathResource resource = new ClassPathResource(DEFAULT_STRATEGIES_PATH, ContextLoader.class);
defaultStrategies = PropertiesLoaderUtils.loadProperties(resource);
}
catch (IOException ex) {
throw new IllegalStateException("Could not load 'ContextLoader.properties': " + ex.getMessage());
}
}

见DispatcherServlet

1
2
3
4
5
6
7
8
9
10
public static final Class<?> DEFAULT_CONTEXT_CLASS = XmlWebApplicationContext.class;

protected WebApplicationContext createWebApplicationContext(@Nullable ApplicationContext parent) {
//getContextClass返回值是DEFAULT_CONTEXT_CLASS
Class<?> contextClass = getContextClass();
......
configureAndRefreshWebApplicationContext(wac);

return wac;
}

启动时候如何加载的init-param,见HttpServletBean的代码,推荐下去试试BeanWrapper

1
2
3
4
5
6
7
//BeanWrapper实际是BeanWrapperImpl【DispatcherServlet】
BeanWrapper bw = PropertyAccessorFactory.forBeanPropertyAccess(this);
ResourceLoader resourceLoader = new ServletContextResourceLoader(getServletContext());
bw.registerCustomEditor(Resource.class, new ResourceEditor(resourceLoader, getEnvironment()));
initBeanWrapper(bw);
//为BeanWrapper赋值,init-Param的name对应的是bw的属性。。。这段不仔细看真看不出来 initParam怎么赋值的
bw.setPropertyValues(pvs, true);

稳定性的看法

Posted on 2020-03-16 | Edited on 2022-09-21 | In 经验积累 , 项目积累

稳定性的定义

外界发生变化时(如:功能的发布、服务的故障),系统能稳定的对外提供服务

稳定性的手段

管理措施

研发规范:

  • 制定代码规范,上线前codereview
  • 制定版本管理规范,对于代码的merge规则,版本号的管理。

上线规范:

  • 避开高峰期
  • 上线前告知上下游风险
  • 制定回滚方案
  • 线上验收机制

服务隔离

将核心服务和非核心服务分离,将经常变更的服务和稳定的服务隔离,将消耗资源的服务和非消耗资源的服务隔离。

手段:业务拆分,异步化

方式:通过以下3个维度拆分服务

  • 运行时隔离:适用场景共用资源池的情况。如:服务共用一个httpclient,一个慢请求会很占用ConnectionPool的线程不释放,针对此方案我们需要提前释放资源,保证其他请求正常进行。
  • 进程隔离:适用场景服务拆分,梳理整个业务,然后根据该功能是否稳定,是否是核心服务,请求量大小来综合考虑,划分成不同的服务。
  • 机器隔离:使用与流量凸涨的情况,我们可以将部分流量有针对性的切到新的机器上。比如:秒杀系统,甚至是有的VIP客户

冗余

如果遇到机器故障,机房故障这种自身无法避免的情况。以上的隔离手段就会失效,这种情况我们要采用冗余的方式来处理。

当和核心服务出现问题后我们可以通过切流等方式将故障转移到没有问题的服务上。

冗余级别:

  • 集群内:采取的方式是N+2,即1个提供服务,2个是冗余
  • 集群间、或者机房间:我们应该采取的服务是N+1,但是要保证1能接住此时的流量。

    服务冗余的要点做到:独立部署、无状态、冗余的副本之间没有依赖。

容灾

服务隔离和冗余已经大部分影响系统稳定性的因素,但是无法解决突发情况,如:流量暴涨、被共计等,针对此我们要制定容灾容错机制。

手段:

  • 限流:自我保护的机制,对于上游调用采用多种降级措施(随机降级-简单易用)。
  • 降级:功能禁用(功能降级);采用缓存,不调用下游依赖服务(上游服务降级),个别服务消耗大量资源的停用服务(服务降级),非核心服务消耗大量数据库资源停用服务(服务降级)

演练

放火演练:检测系统稳定性,发现隐患,验证稳定性手段。
演练根据级别分为:服务演练→服务演练→机器演练→集群级别→机房级别 。(建议做机器的放火演练)

压测:明确系统瓶颈。

描述稳定性的指标

可用性指标:SLA(2个9到5个9)

故障度量:PX(P3→P0)

响应时间:time<1s→time<2s→time<3s→time>3s

服务内部调用:time<100ms→time<200ms→time<1s→time>1s

总结,稳定性一般做到99.99%已经是很成熟的系统了。

Spring源码-ApplicationContext

Posted on 2019-12-31 | Edited on 2022-09-21 | In java , spring , 源码

spring框架中的BeanFactory和ApplicationContext是非常重要的俩个接口。
ApplicationContext是BeanFactory的子接口,BeanFactory是IOC容器,ApplicationContext是应用的上下文除了实现了BeanFactory还实现了配置文件的读取等操作。
所有的bean初始化都在ApplicationContext的refresh方法中完成。本文以AnnotationConfigApplicationContext为例。

继承关系图如下
avator

BeanFactory

名字的直译是Bean工厂,我们定义的Bean在这里就行初始化。图中真正可以作为一个独立使用的IOC容器的是DefaultListableBeanFactory

BeanFactory主要的方法是getBean,用来获取Bean

3个子接口:

  • HierarchicalBeanFactory:提供父容器的访问功能
  • ListableBeanFactory:提供了批量获取Bean的方法
  • AutowireCapableBeanFactory:在BeanFactory基础上实现对已存在实例的管理
1
2
3
4
5
6
7
8
public interface HierarchicalBeanFactory extends BeanFactory {

//返回父类的BeanFactory
BeanFactory getParentBeanFactory();

//当前beanfacatory是否包含bean,不会去父类的BeanFactory找
boolean containsLocalBean(String name);
}
1
2
3
4
5
6
7
8
9
10
11
12
13
14
15
16
17
18
19
20
21
22
23
24
25
26
27
28
29
30
//提供通过beanName、类型查找Bean的接口
public interface ListableBeanFactory extends BeanFactory {

boolean containsBeanDefinition(String beanName);

int getBeanDefinitionCount();

String[] getBeanDefinitionNames();

String[] getBeanNamesForType(ResolvableType type);

String[] getBeanNamesForType(ResolvableType type, boolean includeNonSingletons, boolean allowEagerInit);

String[] getBeanNamesForType(@Nullable Class<?> type);

String[] getBeanNamesForType(@Nullable Class<?> type, boolean includeNonSingletons, boolean allowEagerInit);

<T> Map<String, T> getBeansOfType(@Nullable Class<T> type) throws BeansException;

<T> Map<String, T> getBeansOfType(@Nullable Class<T> type, boolean includeNonSingletons, boolean allowEagerInit)throws BeansException;


String[] getBeanNamesForAnnotation(Class<? extends Annotation> annotationType);


Map<String, Object> getBeansWithAnnotation(Class<? extends Annotation> annotationType) throws BeansException;


<A extends Annotation> A findAnnotationOnBean(String beanName, Class<A> annotationType)throws NoSuchBeanDefinitionException;
}
1
2
3
4
5
6
7
8
9
10
11
12
13
14
15
16
public interface AutowireCapableBeanFactory extends BeanFactory {

int AUTOWIRE_NO = 0;//按照构造方法自动装配
int AUTOWIRE_BY_NAME = 1;//按照名称autowire
int AUTOWIRE_BY_TYPE = 2;//按照类型autowire
int AUTOWIRE_CONSTRUCTOR = 3;//按照构造方法自动装配

// 使用autowireBeanProperties装配属性
void autowireBean(Object existingBean) throws BeansException;

// 自动装配属性,填充属性值,使用诸如setBeanName,setBeanFactory这样的工厂回调填充属性,最好还要调用post processor
Object configureBean(Object existingBean, String beanName) throws BeansException;

//会执行bean完整的初始化,包括BeanPostProcessors和initializeBean
Object createBean(Class<?> beanClass, int autowireMode, boolean dependencyCheck) throws BeansException;
}

AnnotationConfigApplicationContext

构造方法:我们以下面的构造方法为例

1
2
3
4
5
6
7
8
public AnnotationConfigApplicationContext(String... basePackages) {
//无参构造函数,-->GenericApplicationContext-->初始化(beanFactory = new DefaultListableBeanFactory())
this();
//扫描包下面的注解,默认支持Commponent(以及他的子类),javax.annotation.ManagedBean,javax.inject.Named
scan(basePackages);
//刷新上下文
refresh();
}

this()做了什么

  1. 调用父类GenericApplicationContext的无参构造方法,在GenericApplicationContext中初始化DefaultListableBeanFactory
  2. 自己的构造方法初始化BeanDefinition的读取器和类扫描器
1
2
3
4
5
6
7
8
9
10
public GenericApplicationContext() {
this.beanFactory = new DefaultListableBeanFactory();
}

public AnnotationConfigApplicationContext() {
//IOC容器初始化注解BeanDefinition的读取器,如果需要注册指定的类就采用reader.register
this.reader = new AnnotatedBeanDefinitionReader(this);
//IOC容器初始化类扫描器,如果是需要扫描某个包下的注解就用scanner.scan
this.scanner = new ClassPathBeanDefinitionScanner(this);
}

scan or register

AnnotationConfigApplicationContext的构造方法一般支持俩种,注册某些Component注解、扫描某一个包,他们具体的区别就在构造方法中的register或者scan,俩者逻辑都差不多,这里我们

  • scan(basePackages),它会调用scanner.scan(basePackages)。scan扫描的bean的注解默认只支持Commponent(以及他的子类),javax.annotation.ManagedBean,javax.inject.Named,如果有特殊的注解需要需要自己实现
  • register(componentClasses),他会调用reader.register(componentClasses)。register注册的bean可以不用加注解。

    这一步实际上是对入参的basePackage或者class,进行扫描或者注册,生成BeanDefinition保存到容器中。BeanDefinition封装了Class的MetaInfo,包含了类名,属性,方法,父类信息等。便于后续根据的BeanDefinition对其包含的对象进行初始化。

    我们来看下 //todo

refresh

真正bean的初始化过程。

1
2
3
4
5
6
7
8
9
10
11
12
13
14
15
16
17
18
19
20
21
22
23
24
25
26
27
28
29
30
31
32
33
34
35
36
37
38
39
40
41
42
43
44
45
46
47
48
49
50
51
52
53
54
55
56
57
58
59
60
61
62
63
64
65
@Override
public void refresh() throws BeansException, IllegalStateException {
//防止并发情况下多次初始化
synchronized (this.startupShutdownMonitor) {
// Prepare this context for refreshing.
prepareRefresh();

// Tell the subclass to refresh the internal bean factory.
ConfigurableListableBeanFactory beanFactory = obtainFreshBeanFactory();

// Prepare the bean factory for use in this context.
prepareBeanFactory(beanFactory);

try {
// Allows post-processing of the bean factory in context subclasses.
postProcessBeanFactory(beanFactory);

// Invoke factory processors registered as beans in the context.
invokeBeanFactoryPostProcessors(beanFactory);

// Register bean processors that intercept bean creation.
registerBeanPostProcessors(beanFactory);

// Initialize message source for this context.
initMessageSource();

// Initialize event multicaster for this context.
initApplicationEventMulticaster();

// Initialize other special beans in specific context subclasses.
onRefresh();

// Check for listener beans and register them.
registerListeners();

// Instantiate all remaining (non-lazy-init) singletons.
finishBeanFactoryInitialization(beanFactory);

// Last step: publish corresponding event.
finishRefresh();
}

catch (BeansException ex) {
if (logger.isWarnEnabled()) {
logger.warn("Exception encountered during context initialization - " +
"cancelling refresh attempt: " + ex);
}

// Destroy already created singletons to avoid dangling resources.
destroyBeans();

// Reset 'active' flag.
cancelRefresh(ex);

// Propagate exception to caller.
throw ex;
}

finally {
// Reset common introspection caches in Spring's core, since we
// might not ever need metadata for singleton beans anymore...
resetCommonCaches();
}
}
}

下面我们一步步的看

prepareRefresh

为refresh做准备,设置Application的startUpdate,将状态改为active,同时初始化properties。

obtainFreshBeanFactory

重新刷新BeanFactrory,代码如下

1
2
3
4
protected ConfigurableListableBeanFactory obtainFreshBeanFactory() {
refreshBeanFactory();
return getBeanFactory();
}

这里的refreshBeanFactory()俩个实现,GenericApplicationContext和AbstractRefreshableApplicationContext

GenericApplicationContext对应的是本文的Annotation在ApplicationContext的构造方法中已经register/scan过,BeanDefinition了这里就不用创建beanfactroy在加载一遍bean了

1
2
3
4
5
6
7
8
9
@Override
protected final void refreshBeanFactory() throws IllegalStateException {
//因为在ApplicationContext的构造方法中已经register/scan过BeanDefinition了这里就不用在重新创建beanfactroy,在加载一边bean了
if (!this.refreshed.compareAndSet(false, true)) {
throw new IllegalStateException(
"GenericApplicationContext does not support multiple refresh attempts: just call 'refresh' once");
}
this.beanFactory.setSerializationId(getId());
}

AbstractRefreshableApplicationContext对应的是xml,file等方式,在构造方法中只是加载文件没有创建BeanDefinition,所在这里要创建BeanDefinition对象

1
2
3
4
5
6
7
8
9
10
11
12
13
14
15
16
17
18
19
20
@Override
protected final void refreshBeanFactory() throws BeansException {
if (hasBeanFactory()) {
destroyBeans();
closeBeanFactory();
}
try {
DefaultListableBeanFactory beanFactory = createBeanFactory();
beanFactory.setSerializationId(getId());
customizeBeanFactory(beanFactory);
//根据构造函数传入到file地址创建,加载BeanDefinition,
loadBeanDefinitions(beanFactory);
synchronized (this.beanFactoryMonitor) {
this.beanFactory = beanFactory;
}
}
catch (IOException ex) {
throw new ApplicationContextException("I/O error parsing bean definition source for " + getDisplayName(), ex);
}
}

prepareBeanFactory

设置beanFactory的classloader,spel表达式,bean的属性处理器,自动装配的例外/特殊规则,BeanProcessor,env等

1
2
3
4
5
6
7
8
9
10
11
12
13
14
15
16
17
18
19
20
21
22
23
24
25
26
27
28
29
30
31
32
33
34
35
36
37
38
39
40
41
42
43
44
45
46
47
48
49
50
51
52
53
54
protected void prepareBeanFactory(ConfigurableListableBeanFactory beanFactory) {
// Tell the internal bean factory to use the context's class loader etc.'
//设置classloader为当前contextLocader
beanFactory.setBeanClassLoader(getClassLoader());
//设置spel表达式
beanFactory.setBeanExpressionResolver(new StandardBeanExpressionResolver(beanFactory.getBeanClassLoader()));
//设置ResourceEditor,用于初始化bean时候填充bean的属性
beanFactory.addPropertyEditorRegistrar(new ResourceEditorRegistrar(this, getEnvironment()));

// Configure the bean factory with context callbacks.
//设置ApplicationContextAwareProcessor实现了BeanPostProcessor,作用:程序可以获取ApplicationContext
// 例:我们程序中自定义MyApplicationContextAware实现ApplicationContextAware接口
// ApplicationContextAwareProcessor在bean初始化前会调用,postProcessBeforeInitialization然后调用MyApplicationContextAware.setApplictionContext
beanFactory.addBeanPostProcessor(new ApplicationContextAwareProcessor(this));
//添加忽略规则,因为在Bean实例化过程中,这些依赖未必会实例化,所以选择忽略,如果bean需要这些依赖,可以采用set等方式。
beanFactory.ignoreDependencyInterface(EnvironmentAware.class);
beanFactory.ignoreDependencyInterface(EmbeddedValueResolverAware.class);
beanFactory.ignoreDependencyInterface(ResourceLoaderAware.class);
beanFactory.ignoreDependencyInterface(ApplicationEventPublisherAware.class);
beanFactory.ignoreDependencyInterface(MessageSourceAware.class);
beanFactory.ignoreDependencyInterface(ApplicationContextAware.class);

// BeanFactory interface not registered as resolvable type in a plain factory.
// MessageSource registered (and found for autowiring) as a bean.
//设置自动装配的规则
beanFactory.registerResolvableDependency(BeanFactory.class, beanFactory);
beanFactory.registerResolvableDependency(ResourceLoader.class, this);
beanFactory.registerResolvableDependency(ApplicationEventPublisher.class, this);
beanFactory.registerResolvableDependency(ApplicationContext.class, this);

// Register early post-processor for detecting inner beans as ApplicationListeners.
//设置容器的后置BeanPostProcessor处理器,将ApplicationListener注册到容器中,见postProcessAfterInitialization
beanFactory.addBeanPostProcessor(new ApplicationListenerDetector(this));

// Detect a LoadTimeWeaver and prepare for weaving, if found.
//判断是否有loadTimeWeaver
if (beanFactory.containsBean(LOAD_TIME_WEAVER_BEAN_NAME)) {
//LoadTimeWeaverAwareProcessor-->从容器中获取loadTimeWeaver,然后添加到LoadTimeWeaverAware中
beanFactory.addBeanPostProcessor(new LoadTimeWeaverAwareProcessor(beanFactory));
// Set a temporary ClassLoader for type matching.
beanFactory.setTempClassLoader(new ContextTypeMatchClassLoader(beanFactory.getBeanClassLoader()));
}

// Register default environment beans.
if (!beanFactory.containsLocalBean(ENVIRONMENT_BEAN_NAME)) {
beanFactory.registerSingleton(ENVIRONMENT_BEAN_NAME, getEnvironment());
}
if (!beanFactory.containsLocalBean(SYSTEM_PROPERTIES_BEAN_NAME)) {
beanFactory.registerSingleton(SYSTEM_PROPERTIES_BEAN_NAME, getEnvironment().getSystemProperties());
}
if (!beanFactory.containsLocalBean(SYSTEM_ENVIRONMENT_BEAN_NAME)) {
beanFactory.registerSingleton(SYSTEM_ENVIRONMENT_BEAN_NAME, getEnvironment().getSystemEnvironment());
}
}

postProcessBeanFactory

没有具体实现的空方法,在beanFactory都设置好以后,留给容器根据自己的使用场景自己定制如:web容器注入一些重要资源(类似Application的属性和ServletContext的属性),我们可以实现该方法。

1
2
3
4
5
6
7
8
9
10
11
12
13
protected void postProcessBeanFactory(ConfigurableListableBeanFactory beanFactory) {
}

//在GenericWebApplicationContext中
@Override
protected void postProcessBeanFactory(ConfigurableListableBeanFactory beanFactory) {
if (this.servletContext != null) {
beanFactory.addBeanPostProcessor(new ServletContextAwareProcessor(this.servletContext));
beanFactory.ignoreDependencyInterface(ServletContextAware.class);
}
WebApplicationContextUtils.registerWebApplicationScopes(beanFactory, this.servletContext);
WebApplicationContextUtils.registerEnvironmentBeans(beanFactory, this.servletContext);
}

invokeBeanFactoryPostProcessors(beanFactory)

容器执行内置的以及用户自定义的BeanDefinitionRegistryPostProcessor以及BeanFactoryPostProcessor的postProcessBeanFactory方法。

BeanDefinitionRegistryPostProcessor作用见链接Spring源码-BeanDefinitionRegistryPostProcessor

流程如下:

  1. invokeBeanFactoryPostProcessors调用PostProcessorRegistrationDelegate.invokeBeanFactoryPostProcessors()方法
  2. 执行容器注册好的BeanDefinitionRegistryPostProcessor.postProcessBeanDefinitionRegistry以及BeanFactoryPostProcessor.postBeanFactory,优先级是实现PriorityOrder接口,Order注解,其他
    1. BeanDefinitionRegistryPostProcessor.postProcessBeanDefinitionRegistry,见ConfigurationClassPostProcessor.postProcessBeanDefinitionRegistry,将Component,Import ImportResource Component注解的类解析Configuratuon
    2. 执行BeanFactoryPostProcessor.postBeanFactory。
1
2
3
4
5
6
7
8
9
10
11
12
13
14
15
16
17
18
19
20
21
22
23
24
25
26
27
28
29
30
31
32
33
34
35
36
37
38
39
40
41
42
43
44
45
46
47
48
49
50
51
52
53
54
55
56
57
58
59
60
61
62
63
64
65
66
67
68
69
70
71
72
73
74
75
76
77
78
79
80
81
82
83
84
85
86
87
88
89
90
91
92
93
94
95
96
97
98
99
100
101
102
103
104
105
106
107
108
109
110
111
112
113
114
115
116
117
118
119
120
121
122
123
124
125
126
127
128
129
130
131
132
133
134
135
136
137
138
139
140
141
142
143
144
145
146
147
148
149
150
151
152
153
154
155
156
157
158
159
160
161
162
163
164
165
166
167
168
protected void invokeBeanFactoryPostProcessors(ConfigurableListableBeanFactory beanFactory) {
//关键代码,执行容器注册的BeanDefinitionRegistryPostProcessor.postProcessBeanDefinitionRegistry以及BeanFactoryPostProcessor.postBeanFactory
PostProcessorRegistrationDelegate.invokeBeanFactoryPostProcessors(beanFactory, getBeanFactoryPostProcessors());

// Detect a LoadTimeWeaver and prepare for weaving, if found in the meantime
// (e.g. through an @Bean method registered by ConfigurationClassPostProcessor)
if (beanFactory.getTempClassLoader() == null && beanFactory.containsBean(LOAD_TIME_WEAVER_BEAN_NAME)) {
beanFactory.addBeanPostProcessor(new LoadTimeWeaverAwareProcessor(beanFactory));
beanFactory.setTempClassLoader(new ContextTypeMatchClassLoader(beanFactory.getBeanClassLoader()));
}
}

/**
* 执行容器注册号的BeanDefinitionRegistryPostProcessor.postProcessBeanDefinitionRegistry以及BeanFactoryPostProcessor.postBeanFactory,
* 优先级是实现PriorityOrder接口,Order注解,其他
* 1.BeanDefinitionRegistryPostProcessor.postProcessBeanDefinitionRegistry,
见ConfigurationClassPostProcessor.postProcessBeanDefinitionRegistry,将Component,Import ImportResource Component注解的类解析Configuratuon
* 2. 执行BeanFactoryPostProcessor.postBeanFactory
* @param beanFactory obtainFreshBeanFactory()返回的factory即DefaultListableBeanFactory
* @param beanFactoryPostProcessors 第一次调用时候为空
*/
public static void invokeBeanFactoryPostProcessors(
ConfigurableListableBeanFactory beanFactory, List<BeanFactoryPostProcessor> beanFactoryPostProcessors) {

// Invoke BeanDefinitionRegistryPostProcessors first, if any.
Set<String> processedBeans = new HashSet<>();
//DefaultListableBeanFactory这里是true
if (beanFactory instanceof BeanDefinitionRegistry) {
BeanDefinitionRegistry registry = (BeanDefinitionRegistry) beanFactory;

List<BeanFactoryPostProcessor> regularPostProcessors = new ArrayList<>();
List<BeanDefinitionRegistryPostProcessor> registryProcessors = new ArrayList<>();

for (BeanFactoryPostProcessor postProcessor : beanFactoryPostProcessors) {
if (postProcessor instanceof BeanDefinitionRegistryPostProcessor) {
BeanDefinitionRegistryPostProcessor registryProcessor =
(BeanDefinitionRegistryPostProcessor) postProcessor;
registryProcessor.postProcessBeanDefinitionRegistry(registry);
//添加到registryProcessors中
registryProcessors.add(registryProcessor);
}
else {
regularPostProcessors.add(postProcessor);
}
}

/**
* 优先执行容器中BeanDefinitionRegistryPostProcessor的,BeanDefinitionRegistryPostProcessor的作用可以动态注册bean
*/
// Do not initialize FactoryBeans here: We need to leave all regular beans
// uninitialized to let the bean factory post-processors apply to them!
// Separate between BeanDefinitionRegistryPostProcessors that implement
// PriorityOrdered, Ordered, and the rest.
List<BeanDefinitionRegistryPostProcessor> currentRegistryProcessors = new ArrayList<>();

//优先执行实现PriorityOrdered接口的currentRegistryProcessors
// First, invoke the BeanDefinitionRegistryPostProcessors that implement PriorityOrdered.
String[] postProcessorNames =
beanFactory.getBeanNamesForType(BeanDefinitionRegistryPostProcessor.class, true, false);
for (String ppName : postProcessorNames) {
if (beanFactory.isTypeMatch(ppName, PriorityOrdered.class)) {
currentRegistryProcessors.add(beanFactory.getBean(ppName, BeanDefinitionRegistryPostProcessor.class));
processedBeans.add(ppName);
}
}
//关键代码:调用ConfigurationClassPostProcessor.postProcessBeanDefinitionRegistry,执行postProcessBeanDefinitionRegistry
sortPostProcessors(currentRegistryProcessors, beanFactory);
registryProcessors.addAll(currentRegistryProcessors);
invokeBeanDefinitionRegistryPostProcessors(currentRegistryProcessors, registry);
currentRegistryProcessors.clear();

// Next, invoke the BeanDefinitionRegistryPostProcessors that implement Ordered.
//其次执行实现了Ordered的BeanDefinitionRegistryPostProcessors
postProcessorNames = beanFactory.getBeanNamesForType(BeanDefinitionRegistryPostProcessor.class, true, false);
for (String ppName : postProcessorNames) {
if (!processedBeans.contains(ppName) && beanFactory.isTypeMatch(ppName, Ordered.class)) {
currentRegistryProcessors.add(beanFactory.getBean(ppName, BeanDefinitionRegistryPostProcessor.class));
processedBeans.add(ppName);
}
}
sortPostProcessors(currentRegistryProcessors, beanFactory);
registryProcessors.addAll(currentRegistryProcessors);
invokeBeanDefinitionRegistryPostProcessors(currentRegistryProcessors, registry);
currentRegistryProcessors.clear();

// Finally, invoke all other BeanDefinitionRegistryPostProcessors until no further ones appear.
//执行普通的BeanDefinitionRegistryPostProcessors
boolean reiterate = true;
while (reiterate) {
reiterate = false;
postProcessorNames = beanFactory.getBeanNamesForType(BeanDefinitionRegistryPostProcessor.class, true, false);
for (String ppName : postProcessorNames) {
if (!processedBeans.contains(ppName)) {
currentRegistryProcessors.add(beanFactory.getBean(ppName, BeanDefinitionRegistryPostProcessor.class));
processedBeans.add(ppName);
reiterate = true;
}
}
sortPostProcessors(currentRegistryProcessors, beanFactory);
registryProcessors.addAll(currentRegistryProcessors);
invokeBeanDefinitionRegistryPostProcessors(currentRegistryProcessors, registry);
currentRegistryProcessors.clear();
}

// Now, invoke the postProcessBeanFactory callback of all processors handled so far.
//执行postProcessBeanFactory
invokeBeanFactoryPostProcessors(registryProcessors, beanFactory);
invokeBeanFactoryPostProcessors(regularPostProcessors, beanFactory);
}

else {
// Invoke factory processors registered with the context instance.
invokeBeanFactoryPostProcessors(beanFactoryPostProcessors, beanFactory);
}

// Do not initialize FactoryBeans here: We need to leave all regular beans
// uninitialized to let the bean factory post-processors apply to them!
String[] postProcessorNames =
beanFactory.getBeanNamesForType(BeanFactoryPostProcessor.class, true, false);

//处理BeanFactoryPostProcessor,BeanFactoryPostProcessor分为priorityOrdered、Odered和Non三类分别处理
// Separate between BeanFactoryPostProcessors that implement PriorityOrdered,
// Ordered, and the rest.
List<BeanFactoryPostProcessor> priorityOrderedPostProcessors = new ArrayList<>();
List<String> orderedPostProcessorNames = new ArrayList<>();
List<String> nonOrderedPostProcessorNames = new ArrayList<>();
for (String ppName : postProcessorNames) {
if (processedBeans.contains(ppName)) {
// skip - already processed in first phase above
}
//todo 这里很不理解为啥priorityOrderedPostProcessors和orderedPostProcessorNames逻辑不一样
else if (beanFactory.isTypeMatch(ppName, PriorityOrdered.class)) {
priorityOrderedPostProcessors.add(beanFactory.getBean(ppName, BeanFactoryPostProcessor.class));
}
else if (beanFactory.isTypeMatch(ppName, Ordered.class)) {
orderedPostProcessorNames.add(ppName);
}
else {
nonOrderedPostProcessorNames.add(ppName);
}
}

// First, invoke the BeanFactoryPostProcessors that implement PriorityOrdered.
//priorityOrderedPostProcessors排序,并且执行自定义的postProcessBeanFactory
sortPostProcessors(priorityOrderedPostProcessors, beanFactory);
invokeBeanFactoryPostProcessors(priorityOrderedPostProcessors, beanFactory);

// Next, invoke the BeanFactoryPostProcessors that implement Ordered.
//加载orderedPostProcessors排序,并且执行自定义的postProcessBeanFactory
List<BeanFactoryPostProcessor> orderedPostProcessors = new ArrayList<>(orderedPostProcessorNames.size());
for (String postProcessorName : orderedPostProcessorNames) {
orderedPostProcessors.add(beanFactory.getBean(postProcessorName, BeanFactoryPostProcessor.class));
}
sortPostProcessors(orderedPostProcessors, beanFactory);
invokeBeanFactoryPostProcessors(orderedPostProcessors, beanFactory);

// Finally, invoke all other BeanFactoryPostProcessors.
//加载nonOrderedPostProcessors、并且执行自定义的postProcessBeanFactory
List<BeanFactoryPostProcessor> nonOrderedPostProcessors = new ArrayList<>(nonOrderedPostProcessorNames.size());
for (String postProcessorName : nonOrderedPostProcessorNames) {
nonOrderedPostProcessors.add(beanFactory.getBean(postProcessorName, BeanFactoryPostProcessor.class));
}
invokeBeanFactoryPostProcessors(nonOrderedPostProcessors, beanFactory);

// Clear cached merged bean definitions since the post-processors might have
// modified the original metadata, e.g. replacing placeholders in values...
beanFactory.clearMetadataCache();
}

registerBeanPostProcessors

注册执行BeanPostProcessors,这指是注册BeanPostProcessors,并没有执行

流程如下:

  1. registerBeanPostProcessors->PostProcessorRegistrationDelegate.registerBeanPostProcessors
  2. 在registerBeanPostProcessors取得所有的BeanPostProcessor
  3. 对BeanPostProcessors分组,分成:PriorityOrdered,Ordered,nonOrdered,internal(属于MergedBeanDefinitionPostProcessor)
  4. 对他们进行排序,注册顺序是PriorityOrdered->Ordered->nonOrdered->internal–>ApplicationListenerDetector
1
2
3
4
5
6
7
8
9
10
11
12
13
14
15
16
17
18
19
20
21
22
23
24
25
26
27
28
29
30
31
32
33
34
35
36
37
38
39
40
41
42
43
44
45
46
47
48
49
50
51
52
53
54
55
56
57
58
59
60
61
62
63
64
65
66
67
68
69
70
71
72
public static void registerBeanPostProcessors(
ConfigurableListableBeanFactory beanFactory, AbstractApplicationContext applicationContext) {
//获取所有的BeanPostProcessor
String[] postProcessorNames = beanFactory.getBeanNamesForType(BeanPostProcessor.class, true, false);

////bean不是基础BeanPostProcessor && bean的Role不是ROLE_INFRASTRUCTURE && beanFactory.getBeanPostProcessorCount()<beanPostProcessorTargetCount
int beanProcessorTargetCount = beanFactory.getBeanPostProcessorCount() + 1 + postProcessorNames.length;
beanFactory.addBeanPostProcessor(new BeanPostProcessorChecker(beanFactory, beanProcessorTargetCount));

// Separate between BeanPostProcessors that implement PriorityOrdered,
// Ordered, and the rest.
//将BeanPostProcessor分类
//对BeanPostProcessors分组,分成:PriorityOrdered,Ordered,nonOrdered,internal(属于MergedBeanDefinitionPostProcessor)
List<BeanPostProcessor> priorityOrderedPostProcessors = new ArrayList<>();
List<BeanPostProcessor> internalPostProcessors = new ArrayList<>();
List<String> orderedPostProcessorNames = new ArrayList<>();//todo 同理,这里为什么是orderedPostProcessorNames,为什么不和priorityOrderedPostProcessors逻辑
List<String> nonOrderedPostProcessorNames = new ArrayList<>();
for (String ppName : postProcessorNames) {
if (beanFactory.isTypeMatch(ppName, PriorityOrdered.class)) {
BeanPostProcessor pp = beanFactory.getBean(ppName, BeanPostProcessor.class);
priorityOrderedPostProcessors.add(pp);
if (pp instanceof MergedBeanDefinitionPostProcessor) {
internalPostProcessors.add(pp);
}
}
else if (beanFactory.isTypeMatch(ppName, Ordered.class)) {
orderedPostProcessorNames.add(ppName);
}
else {
nonOrderedPostProcessorNames.add(ppName);
}
}

//执行顺序是PriorityOrdered->Ordered->nonOrdered->internal-->ApplicationListenerDetector

// First, register the BeanPostProcessors that implement PriorityOrdered.
sortPostProcessors(priorityOrderedPostProcessors, beanFactory);
registerBeanPostProcessors(beanFactory, priorityOrderedPostProcessors);

// Next, register the BeanPostProcessors that implement Ordered.
List<BeanPostProcessor> orderedPostProcessors = new ArrayList<>(orderedPostProcessorNames.size());
for (String ppName : orderedPostProcessorNames) {
BeanPostProcessor pp = beanFactory.getBean(ppName, BeanPostProcessor.class);
orderedPostProcessors.add(pp);
if (pp instanceof MergedBeanDefinitionPostProcessor) {
internalPostProcessors.add(pp);
}
}
sortPostProcessors(orderedPostProcessors, beanFactory);
registerBeanPostProcessors(beanFactory, orderedPostProcessors);

// Now, register all regular BeanPostProcessors.
List<BeanPostProcessor> nonOrderedPostProcessors = new ArrayList<>(nonOrderedPostProcessorNames.size());
for (String ppName : nonOrderedPostProcessorNames) {
BeanPostProcessor pp = beanFactory.getBean(ppName, BeanPostProcessor.class);
nonOrderedPostProcessors.add(pp);
if (pp instanceof MergedBeanDefinitionPostProcessor) {
internalPostProcessors.add(pp);
}
}
registerBeanPostProcessors(beanFactory, nonOrderedPostProcessors);

// Finally, re-register all internal BeanPostProcessors.
sortPostProcessors(internalPostProcessors, beanFactory);
registerBeanPostProcessors(beanFactory, internalPostProcessors);

// Re-register post-processor for detecting inner beans as ApplicationListeners,
// moving it to the end of the processor chain (for picking up proxies etc).
//注册一个特殊的BeanPostProcessor,ApplicationListenerDetector是一个修饰器类,他会见ApplicationListener重新注册给application。
//这就是多一个参数applicationContext的一一,在最后一位
beanFactory.addBeanPostProcessor(new ApplicationListenerDetector(applicationContext));
}

initMessageSource

【todo】暂时忽略

initApplicationEventMulticaster

【注册时间监听器】后续单独拿出一章讲。
这里,注册ApplicationEventMulticaster 默认 SimpleApplicationEventMulticaster

registerListeners

注册定义的ApplicationListener,注册容器的event和自定义的eventListener

1
2
3
4
5
6
7
8
9
10
11
12
13
14
15
16
17
18
19
20
21
22
23
protected void registerListeners() {
// Register statically specified listeners first.
for (ApplicationListener<?> listener : getApplicationListeners()) {
getApplicationEventMulticaster().addApplicationListener(listener);
}

// Do not initialize FactoryBeans here: We need to leave all regular beans
// uninitialized to let post-processors apply to them!
//所有ApplicationListener的实现者
String[] listenerBeanNames = getBeanNamesForType(ApplicationListener.class, true, false);
for (String listenerBeanName : listenerBeanNames) {
getApplicationEventMulticaster().addApplicationListenerBean(listenerBeanName);
}

// Publish early application events now that we finally have a multicaster...
Set<ApplicationEvent> earlyEventsToProcess = this.earlyApplicationEvents;
this.earlyApplicationEvents = null;
if (earlyEventsToProcess != null) {
for (ApplicationEvent earlyEvent : earlyEventsToProcess) {
getApplicationEventMulticaster().multicastEvent(earlyEvent);
}
}
}

preInstantiateSingletons

对之前在AplicationContext构造方法中,scan或者register时候生成的BeanDefinition进行实例化,注意,这里只针对,单例、非延迟加载的BeanDefinition的实体化,具体方法在DefaultListableBeanFactory.preInstantiateSingletons中。见:Spring源码-BeanDefinition

1
2
3
4
5
6
7
8
9
10
11
12
13
14
15
16
17
18
19
20
21
22
23
24
25
26
27
28
29
30
31
32
33
34
35
36
37
38
39
40
41
42
43
44
45
46
47
48
49
50
51
52
53
54
55
56
57
58
59
60
61
62
63
@Override
public void preInstantiateSingletons() throws BeansException {
if (logger.isTraceEnabled()) {
logger.trace("Pre-instantiating singletons in " + this);
}

// Iterate over a copy to allow for init methods which in turn register new bean definitions.
// While this may not be part of the regular factory bootstrap, it does otherwise work fine.
List<String> beanNames = new ArrayList<>(this.beanDefinitionNames);

// Trigger initialization of all non-lazy singleton beans...
for (String beanName : beanNames) {
//在之前的步骤中的getBeanNamesForType方法会调用getMergedLocalBeanDefinition中
//todo 将BeanDefinition写入到mergedBeanDefinitions中,后续单独讲BeanDefinition时候单独说
RootBeanDefinition bd = getMergedLocalBeanDefinition(beanName);
//bd非抽象 && 单利 && 不延迟加载
if (!bd.isAbstract() && bd.isSingleton() && !bd.isLazyInit()) {
//如果是factoryBean通过"&beanName"得到factoryBean
if (isFactoryBean(beanName)) {
//这一步很关键,如果是factory先初始化factroyBean
Object bean = getBean(FACTORY_BEAN_PREFIX + beanName);
if (bean instanceof FactoryBean) {
final FactoryBean<?> factory = (FactoryBean<?>) bean;
boolean isEagerInit;
//如果isEagerInit为true,则通过factoryBean.getObject()获取actoryBean中的对象
if (System.getSecurityManager() != null && factory instanceof SmartFactoryBean) {
isEagerInit = AccessController.doPrivileged((PrivilegedAction<Boolean>)
((SmartFactoryBean<?>) factory)::isEagerInit,
getAccessControlContext());
}
else {
isEagerInit = (factory instanceof SmartFactoryBean &&
((SmartFactoryBean<?>) factory).isEagerInit());
}
if (isEagerInit) {
getBean(beanName);
}
}
}
else {
//普通的bean初始化bean
getBean(beanName);
}
}
}

// Trigger post-initialization callback for all applicable beans...
for (String beanName : beanNames) {
Object singletonInstance = getSingleton(beanName);
if (singletonInstance instanceof SmartInitializingSingleton) {
final SmartInitializingSingleton smartSingleton = (SmartInitializingSingleton) singletonInstance;
if (System.getSecurityManager() != null) {
AccessController.doPrivileged((PrivilegedAction<Object>) () -> {
smartSingleton.afterSingletonsInstantiated();
return null;
}, getAccessControlContext());
}
else {
smartSingleton.afterSingletonsInstantiated();
}
}
}
}

finishRefresh

完成applicationContext的refresh,发送系统事件等

1
2
3
4
5
6
7
8
9
10
11
12
13
14
15
16
17
18
19
protected void finishRefresh() {
// Clear context-level resource caches (such as ASM metadata from scanning).
clearResourceCaches();

// Initialize lifecycle processor for this context.
//初始化LifecycleProcessor,todo mark 作用还需要单独了解
initLifecycleProcessor();

// Propagate refresh to lifecycle processor first.
//调用上面的LifecycleProcessor.onRefresh()
getLifecycleProcessor().onRefresh();

// Publish the final event.发送ContextRefreshedEvent事件
publishEvent(new ContextRefreshedEvent(this));

// Participate in LiveBeansView MBean, if active.
//todo mark 作用还需要单独了解
LiveBeansView.registerApplicationContext(this);
}

Spring源码-ApplicationListener基于事件的订阅者发布者模式

Posted on 2019-12-28 | Edited on 2022-09-21 | In java , spring , 源码

如何使用

spring容器自身提供了基于事件的订阅者发布者模式,即ApplicationListener,它能支持一些系统事件具体见ApplicationEvent的子类,同时也支持我们自定义事件使用方法如下

容器自身的事件,如:ApplicationContextEvent,我们想获取一个全局变量ApplicationContext(代码仅供参考)

1
2
3
4
5
6
7
8
9
10
11
12
@Component
public class ContextRefreshAppliationListener implements ApplicationListener<ApplicationContextEvent> {

public static ApplicationContextEvent applicationContext;

//触发 application.pulish(new ContextRefreshedEvent())
@Override
public void onApplicationEvent(ContextRefreshedEvent event) {
//容器启动后在某些节点会发送事件,我们只需要实现onApplicationEvent即可。
applicationContext=event.getApplicationContext();
}
}

自定义事件:

  1. 定义事件,事件继承自ApplicationEvent
  2. 实现该事件的AppliationListener
  3. 在程序某个时间点触发applicationContext.publishEvent方法
1
2
3
4
5
6
7
8
9
10
11
12
13
14
15
16
17
18
19
20
21
22
23
24
25
26
27
28
29
public class CoustomEvent extends ApplicationEvent {
private String name;
private String eventType;
private String summary;

public CoustomEvent(Object source, String name, String eventType, String summary) {
this(source);
this.name = name;
this.eventType = eventType;
this.summary = summary;
}

public CoustomEvent(Object source) {
super(source);
}
}

@Component
public class CoustomAppliationListener implements ApplicationListener<CoustomEvent> {

//触发 application.pulish(new ContextRefreshedEvent())
@Override
public void onApplicationEvent(CoustomEvent event) {
System.out.println(event.getName() + " eventType:" + event.getEventType() + " summary:" + event.getSummary() + " in time:" + event.getTimestamp());
}
}

//触发
applicationContext.publishEvent(new CoustomEvent("source","liuhao","sendEmail"," dest liu67224657@qq.com"));

原理

tbd

Spring源码-类扫描器-ClassPathBeanDefinitionScanner

Posted on 2019-12-28 | Edited on 2022-09-21 | In java , spring , 源码

我们在Spring源码-ApplicationContext中介绍了ApplicationContext都做了什么,其中会对容器中的BeanDefinition对应的class进行初始化,那么BeanDefinition是怎么产生的呢?其中ClassPathBeanDefinitionScanner是做什么用的呢?

ClassPathBeanDefinitionScanner类扫描器,作用通过对制定的basepackage进行扫描,创建、注册BeanDefinition。见类图:
ClassPathBeanDefinitionScanner类图

见下面代码,在无参构造方法中初始化ClassPathBeanDefinitionScanner,之后调用scan(basePackages)将basePackages下的class文件生成BeanDefiniton同时注册

1
2
3
4
5
6
7
8
9
10
11
12
13
14
15
16
public AnnotationConfigApplicationContext(String... basePackages) {
//无参构造函数,初始化reader和scanner,在父类GenericApplicationContext的无参构造方法初始化(beanFactory = new DefaultListableBeanFactory()),
this();
//扫描basePackages并且加载BeanDefinition
scan(basePackages);
//刷新上下文
refresh();
}

//this()方法的内部
public AnnotationConfigApplicationContext() {
//IOC容器初始化注解BeanDefinition的读取器
this.reader = new AnnotatedBeanDefinitionReader(this);
//IOC容器初始化类扫描器
this.scanner = new ClassPathBeanDefinitionScanner(this);
}

scan的解析

ClassPathBeanDefinitionScanner.scan()–>ClassPathBeanDefinitionScanner.doScan(),doScan方法的逻辑如下

  1. 文件生成BeanDefinition
    1. 针对指定的Basepackage找对应的文件,即Resource
    2. 将Resource转换成BeanDefinition注册到容器中
      1. 用spring-asm将Resource生成MetatDataReader
      2. 判断class是否符合容器注入条件(利用typefilter.match)
      3. 生成BeanDefinition,加入到返回值中返回
  2. 处理BeanDefinition
1
2
3
4
5
6
7
8
9
10
11
12
13
14
15
16
17
18
19
20
21
22
23
24
25
26
27
28
protected Set<BeanDefinitionHolder> doScan(String... basePackages) {
Assert.notEmpty(basePackages, "At least one base package must be specified");
Set<BeanDefinitionHolder> beanDefinitions = new LinkedHashSet<>();
for (String basePackage : basePackages) {
//通过文件找到符合规则的BeanDefinition
Set<BeanDefinition> candidates = findCandidateComponents(basePackage);
//处理BeanDefinition
for (BeanDefinition candidate : candidates) {
ScopeMetadata scopeMetadata = this.scopeMetadataResolver.resolveScopeMetadata(candidate);
candidate.setScope(scopeMetadata.getScopeName());
String beanName = this.beanNameGenerator.generateBeanName(candidate, this.registry);
if (candidate instanceof AbstractBeanDefinition) {
postProcessBeanDefinition((AbstractBeanDefinition) candidate, beanName);
}
if (candidate instanceof AnnotatedBeanDefinition) {
AnnotationConfigUtils.processCommonDefinitionAnnotations((AnnotatedBeanDefinition) candidate);
}
if (checkCandidate(beanName, candidate)) {
BeanDefinitionHolder definitionHolder = new BeanDefinitionHolder(candidate, beanName);
definitionHolder =
AnnotationConfigUtils.applyScopedProxyMode(scopeMetadata, definitionHolder, this.registry);
beanDefinitions.add(definitionHolder);
registerBeanDefinition(definitionHolder, this.registry);
}
}
}
return beanDefinitions;
}

查找并且生成BeanDefinition

主要的方法是findCandidateComponents,通过指定的basePackage生成BeanDefinition,其中关键之一是PathMatchingResourcePatternResolver,里面会有目录的匹配引擎来找打牌basePackage下所有符合规则的类。

下面的代码是整个findCandidateComponents的逻辑,其中getResourcePatternResolver()就是获取PathMatchingResourcePatternResolver

1
2
3
4
5
6
7
8
9
10
11
12
13
14
15
16
17
18
19
20
21
22
23
24
25
26
27
28
29
public Set<BeanDefinition> findCandidateComponents(String basePackage) {
if (this.componentsIndex != null && indexSupportsIncludeFilters()) {
return addCandidateComponentsFromIndex(this.componentsIndex, basePackage);
}
else {
//扫描制定的basePackage
return scanCandidateComponents(basePackage);
}
}

private Set<BeanDefinition> scanCandidateComponents(String basePackage) {
Set<BeanDefinition> candidates = new LinkedHashSet<>();
try {
//解析basePackage,生成绝对地址ClassPath*:/xx/xx/*/**.class
String packageSearchPath = ResourcePatternResolver.CLASSPATH_ALL_URL_PREFIX +
resolveBasePackage(basePackage) + '/' + this.resourcePattern;
//通过PathMatchingResourcePatternResolver找到该目录下的Reousrce即文件
Resource[] resources = getResourcePatternResolver().getResources(packageSearchPath);
......
for (Resource resource : resources) {
//resource生成BeanDefinition 暂且忽略,后面会详细解析
......
}
}
catch (IOException ex) {
throw new BeanDefinitionStoreException("I/O failure during classpath scanning", ex);
}
return candidates;
}

文件生成Resouces

getResourcePatternResolver()对应的是PathMatchingResourcePatternResolver类,getResources流程如下

  1. findCandidateComponents()方法中,先给basePackage先加上classPath*:,调用getResources方法
  2. 走到findPathMatchingResources所在的分支处理locationPattern,分离出rootDirPath和subPattern
  3. 再次调用getResources(rootDirPath)方法回到上面的方法走到else分支调用findAllClassPathResources方法
  4. 在findAllClassPathResources中调用doFindAllClassPathResources,加载RootDir对应的rootDirResources
  5. 继续回到<2>中的findPathMatchingResources,遍历rootDirResources,这里主要执行else分支doFindPathMatchingFileResources
  6. 通过rootDirPath和subPattern(即 */**等)找到所有符合规则的Class对应的Resource,过程是:
    • doFindPathMatchingFileResources–>doFindMatchingFileSystemResources
    • doFindMatchingFileSystemResources–>retrieveMatchingFiles
    • retrieveMatchingFiles–>doRetrieveMatchingFiles递归执行直到找到所有符合规则的File,并且在doFindMatchingFileSystemResources生成FileSystemResource
1
2
3
4
5
//basePackage先加上 classPath*:
String packageSearchPath = ResourcePatternResolver.CLASSPATH_ALL_URL_PREFIX +
resolveBasePackage(basePackage) + '/' + this.resourcePattern;
//通过PathMatchingResourcePatternResolver找到该目录下的Reousrce即文件
Resource[] resources = getResourcePatternResolver().getResources(packageSearchPath);
1
2
3
4
5
6
7
8
9
10
11
12
13
14
15
16
17
18
19
20
public Resource[] getResources(String locationPattern) throws IOException {
Assert.notNull(locationPattern, "Location pattern must not be null");
//包含ClassPath*:
if (locationPattern.startsWith(CLASSPATH_ALL_URL_PREFIX)) {
// a class path resource (multiple resources for same name possible)
if (getPathMatcher().isPattern(locationPattern.substring(CLASSPATH_ALL_URL_PREFIX.length()))) {
// a class path resource pattern
//包含特殊字符 * ? {}在findPathMatchingResources中会去掉这些特殊字符,在调用getResources,走到else的分支
return findPathMatchingResources(locationPattern);
}
else {
//调用doFindAllClassPathResources加载所有的类
// all class path resources with the given name
return findAllClassPathResources(locationPattern.substring(CLASSPATH_ALL_URL_PREFIX.length()));
}
}
else {
......
}
}
1
2
3
4
5
6
7
8
9
10
11
12
13
14
15
16
17
18
19
20
21
22
23
24
25
26
27
28
29
30
31
32
33
34
35
protected Resource[] findPathMatchingResources(String locationPattern) throws IOException {
String rootDirPath = determineRootDir(locationPattern);//eg: classpath*:com/ericliu/spring/**/**/*.class-->classpath*:com/ericliu/spring/
String subPattern = locationPattern.substring(rootDirPath.length());//eg: classpath*:com/ericliu/spring/**/**/*.class--> **/**/*.class
//继续调用getResources-->这时候因为classpath*:已经被替换掉会走到findAllClassPathResources分支,
// 在findAllClassPathResources里加载rootDirPath对应的Reousrce,因为是目录所以数组有几个basePackage就有几个location
// 如:URL [file:<绝对路径>/<rootDirPath>/]
Resource[] rootDirResources = getResources(rootDirPath);
Set<Resource> result = new LinkedHashSet<>(16);
for (Resource rootDirResource : rootDirResources) {
rootDirResource = resolveRootDirResource(rootDirResource);
URL rootDirUrl = rootDirResource.getURL();
//根据rootDirUrl的类型调用不同的逻辑,bundle:// ,vfs , *.jar
if (equinoxResolveMethod != null && rootDirUrl.getProtocol().startsWith("bundle")) {
URL resolvedUrl = (URL) ReflectionUtils.invokeMethod(equinoxResolveMethod, null, rootDirUrl);
if (resolvedUrl != null) {
rootDirUrl = resolvedUrl;
}
rootDirResource = new UrlResource(rootDirUrl);
}
if (rootDirUrl.getProtocol().startsWith(ResourceUtils.URL_PROTOCOL_VFS)) {
result.addAll(VfsResourceMatchingDelegate.findMatchingResources(rootDirUrl, subPattern, getPathMatcher()));
}
else if (ResourceUtils.isJarURL(rootDirUrl) || isJarResource(rootDirResource)) {
result.addAll(doFindPathMatchingJarResources(rootDirResource, rootDirUrl, subPattern));
}
else {
//主要是执行这里的逻辑,去rootDirResource查找符合subPattern的resource(文件)
result.addAll(doFindPathMatchingFileResources(rootDirResource, subPattern));
}
}
if (logger.isTraceEnabled()) {
logger.trace("Resolved location pattern [" + locationPattern + "] to resources " + result);
}
return result.toArray(new Resource[0]);
}

doRetrieveMatchingFiles查找符合规则的文件

1
2
3
4
5
6
7
8
9
10
11
12
13
14
15
16
17
18
19
20
21
22
23
24
protected void doRetrieveMatchingFiles(String fullPattern, File dir, Set<File> result) throws IOException {
if (logger.isTraceEnabled()) {
logger.trace("Searching directory [" + dir.getAbsolutePath() +
"] for files matching pattern [" + fullPattern + "]");
}
for (File content : listDirectory(dir)) {
String currPath = StringUtils.replace(content.getAbsolutePath(), File.separator, "/");
//如果是目录,且和fullPattern匹配递归去子目录开始查找
if (content.isDirectory() && getPathMatcher().matchStart(fullPattern, currPath + "/")) {
if (!content.canRead()) {
if (logger.isDebugEnabled()) {
logger.debug("Skipping subdirectory [" + dir.getAbsolutePath() +
"] because the application is not allowed to read the directory");
}
}
else {
doRetrieveMatchingFiles(fullPattern, content, result);
}
}
if (getPathMatcher().match(fullPattern, currPath)) {
result.add(content);
}
}
}

Reosurce生成BenDefinition

scanCandidateComponents方法中循环上面生成的Resource数组,生成BeanDefinition,其中需要

  1. 获取metadataReader
  2. 判断resource是否符合我们的注入条件
  3. 生成ScannedGenericBeanDefinition
1
2
3
4
5
6
7
8
9
10
11
12
13
14
15
16
17
18
19
20
21
22
23
24
25
26
27
28
29
30
31
32
33
34
35
36
37
38
39
40
41
42
43
44
45
46
47
48
49
50
51
52
53
54
55
56
private Set<BeanDefinition> scanCandidateComponents(String basePackage) {
Set<BeanDefinition> candidates = new LinkedHashSet<>();
try {
//解析basePackage,生成绝对地址ClassPath*:/xx/xx/*/**.class
String packageSearchPath = ResourcePatternResolver.CLASSPATH_ALL_URL_PREFIX +
resolveBasePackage(basePackage) + '/' + this.resourcePattern;
//通过PathMatchingResourcePatternResolver找到该目录下的Reousrce即文件
Resource[] resources = getResourcePatternResolver().getResources(packageSearchPath);
......
for (Resource resource : resources) {
......
if (resource.isReadable()) {
try {
//1.获取MetadataReader,这里是CachingMetadataReaderFactory,通过SimpleMetadataReaderFactory生成SimpleMetadataReader(resource,defaultResourceLoader.getClassLoader)
MetadataReader metadataReader = getMetadataReaderFactory().getMetadataReader(resource);
//判断是否符合条件的Component
if (isCandidateComponent(metadataReader)) {
ScannedGenericBeanDefinition sbd = new ScannedGenericBeanDefinition(metadataReader);
sbd.setResource(resource);
sbd.setSource(resource);
/**
* isCandidateComponent(sbd)为true
* isIndependent不是内部类(内部类对应的外部类为空,且没有static内部类)
* isConcrete:不是借口和抽象类 || 是抽象类,但是metadata有Lookup注解
* 加入到结果集
*/
if (isCandidateComponent(sbd)) {
if (debugEnabled) {
logger.debug("Identified candidate component class: " + resource);
}
//
candidates.add(sbd);
}
else {
......
}
}
else {
......
}
}
catch (Throwable ex) {
throw new BeanDefinitionStoreException(
"Failed to read candidate component class: " + resource, ex);
}
}
else {
......
}
}
}
catch (IOException ex) {
throw new BeanDefinitionStoreException("I/O failure during classpath scanning", ex);
}
return candidates;
}

获取Resource对应的MetadataReader

  1. 这里是CachingMetadataReaderFactory类,它继承了SimpleMetadataReaderFactory调用super.getMetadataReader得到SimpleMetadataReader
  2. SimpleMetadataReader构造方法SimpleMetadataReader(resource,defaultResourceLoader.getClassLoader)
  3. SimpleMetadataReader通过spring-asm来操作class文件字节码解析resource(resource通过io读成byte具体如何解析见jvm对class类的解析)
1
2
3
4
5
6
7
8
9
10
11
12
13
14
//SimpleMetadataReaderFactory
@Override
public MetadataReader getMetadataReader(Resource resource) throws IOException {
return new SimpleMetadataReader(resource, this.resourceLoader.getClassLoader());
}

//SimpleMetadataReader
SimpleMetadataReader(Resource resource, @Nullable ClassLoader classLoader) throws IOException {
//观察者
SimpleAnnotationMetadataReadingVisitor visitor = new SimpleAnnotationMetadataReadingVisitor(classLoader);
getClassReader(resource).accept(visitor, PARSING_OPTIONS);
this.resource = resource;
this.annotationMetadata = visitor.getMetadata();//获取MetaData
}

调用isCandidateComponent方法,通过MetaDataReader来判断其是否符合注入条件,我们通过ClassPathBeanDefinitionScanner的构造方法层层跟进到registerDefaultFilters方法时候就能知道spring的includeFilters支持那些默认的注解见下面,(如果要实现自定义注解要实现TypeFilter和matcher方法具体见Spring源码-实现自定义注解)

1
2
3
4
5
6
7
8
9
10
11
12
13
14
15
16
17
18
19
20
21
22
23
protected void registerDefaultFilters() {
//Component
this.includeFilters.add(new AnnotationTypeFilter(Component.class));
ClassLoader cl = ClassPathScanningCandidateComponentProvider.class.getClassLoader();
try {
//javax.annotation.ManagedBean
this.includeFilters.add(new AnnotationTypeFilter(
((Class<? extends Annotation>) ClassUtils.forName("javax.annotation.ManagedBean", cl)), false));
......
}
catch (ClassNotFoundException ex) {
// JSR-250 1.1 API (as included in Java EE 6) not available - simply skip.
}
try {
//javax.inject.Named
this.includeFilters.add(new AnnotationTypeFilter(
((Class<? extends Annotation>) ClassUtils.forName("javax.inject.Named", cl)), false));
......
}
catch (ClassNotFoundException ex) {
// JSR-330 API not available - simply skip.
}
}

isCandidateComponent的方法注释

1
2
3
4
5
6
7
8
9
10
11
12
13
14
15
protected boolean isCandidateComponent(MetadataReader metadataReader) throws IOException {
for (TypeFilter tf : this.excludeFilters) {
if (tf.match(metadataReader, getMetadataReaderFactory())) {
return false;
}
}
for (TypeFilter tf : this.includeFilters) {
//typteFilter.match返回true
if (tf.match(metadataReader, getMetadataReaderFactory())) {
//判断condintional是否符合条件,注意里面实现的方法名是shouldSkip这里没有注解或者符合条件返回false
return isConditionMatch(metadataReader);
}
}
return false;
}

生成BeanDefinition,这里是ScannedGenericBeanDefinition,设置Resource和Source属性,再次isCandidateComponent判断是否符合条件如果符合直接加入到结果candidates中(不是内部类同时 不是接口和抽象类,或者是接口但是方法有Lookup注解)

处理BeanDefinition

回到doScan方法,在执行完findCandidateComponents方法回去了需要注册的BeanDefiniton之后,我们要继续填充beanDefiniton的属性,并且注册到registry,见代码:

1
2
3
4
5
6
7
8
9
10
11
12
13
14
15
16
17
18
19
20
21
22
23
24
25
26
27
28
29
30
31
32
33
34
35
36
37
38
protected Set<BeanDefinitionHolder> doScan(String... basePackages) {
Assert.notEmpty(basePackages, "At least one base package must be specified");
Set<BeanDefinitionHolder> beanDefinitions = new LinkedHashSet<>();
for (String basePackage : basePackages) {
Set<BeanDefinition> candidates = findCandidateComponents(basePackage);
for (BeanDefinition candidate : candidates) {
//从definition的Annotated获取Scope注解,根据scope注解获取ScopeMetadata
ScopeMetadata scopeMetadata = this.scopeMetadataResolver.resolveScopeMetadata(candidate);
candidate.setScope(scopeMetadata.getScopeName());
//生成beanName,从Commponent,或者javax.annotation.ManagedBean、javax.inject.Named的value取,或者系统默认生成
String beanName = this.beanNameGenerator.generateBeanName(candidate, this.registry);
//设置beanDefinition的默认属性,设置是否参与自动注入
if (candidate instanceof AbstractBeanDefinition) {
postProcessBeanDefinition((AbstractBeanDefinition) candidate, beanName);
}
//通过注解的MetaData设置属性,用来覆盖默认属性如 lazyInit,Primary,DependsOn,Role,Description属性
if (candidate instanceof AnnotatedBeanDefinition) {
AnnotationConfigUtils.processCommonDefinitionAnnotations((AnnotatedBeanDefinition) candidate);
}
//注册BeanDefinition
// 1.!this.registry.containsBeanDefinition(beanName)
// 2.如果beanName存在,beanDefinition和existingDef兼容,说明不用再次注册
// (不是ScannedGenericBeanDefinition or source相同 or beanDefinition==existingDefinition)
// 3.如果beanName存在,还不兼容抛异常ConflictingBeanDefinitionException
if (checkCandidate(beanName, candidate)) {
//创建BeanDefinitionHolder
BeanDefinitionHolder definitionHolder = new BeanDefinitionHolder(candidate, beanName);
definitionHolder =
AnnotationConfigUtils.applyScopedProxyMode(scopeMetadata, definitionHolder, this.registry);
//放到beanDefinitions结果集
beanDefinitions.add(definitionHolder);
//注册到registry中
registerBeanDefinition(definitionHolder, this.registry);
}
}
}
return beanDefinitions;
}

Spring源码-BeanDefinition

Posted on 2019-12-27 | Edited on 2022-09-21 | In java , spring , 源码

我们在xml中配置的bean标签、我们平时用的Component等注解标注的类,在容器中都会转化成BeanDefinition缓存在BeanDefinitionRegistry中。

在上一章Spring源码-类扫描器-ClassPathBeanDefinitionScanner中介绍了通过scan(basePackages)来从指定basePakcages下的class文件到ScannedGenericBeanDefinition的过程,我们本章就以ScannedGenericBeanDefinition来描述BeanDefinition。

类图:

avator

ScannedGenericBeanDefinition继承自GenericBeanDefinition,GenericBeanDefinition继承自AbstractBeanDefinition,AbstractBeanDefinition实现了BeanDefinition接口。

同时实现了AnnotatedBeanDefinition接口用于访问注解的信息。

BeanDefinition

方法

1
2
3
4
5
6
7
8
9
10
11
12
13
14
15
16
17
18
19
20
21
22
23
String: getBeanClassName: 返回当前bean definition定义的类名
ConstructorArgumentValues: getConstructorArgumentValues:返回bean的构造函数参数
String[]: getDependsOn:返回当前bean所依赖的其他bean的名称
String: getFactoryBeanName: 返回factory bean的名称
String: getFactoryMethodName: 返回工厂方法的名称
BeanDefinition: getOriginatingBeanDefinition: 返回原始的BeanDefinition,如果不存在返回null
String: getParentName: 返回当前bean definition的父definition的名字
MutablePropertyValues: getPropertyValues: 返回一个用于新的bean实例上的属性值
String: getScope: 返回当前bean的目标范围
boolean: isAbstract: 当前bean是否是abstract,意味着不能被实例化
boolean: isLazyInit: bean是否是延迟初始化
boolean: isPrimary: bean是否为自动装配的主要候选bean
boolean: isPrototype: bean是否是多实例
boolean: isSingleton: bean是否是单例
void: setAutowiredCandidate(boolean): 设置bean是否对其他bean是自动装配的候选bean
void: setBeanClassName(String): 指定bean definition的类名
void: setDependsOn(String ...): 设置当前bean初始化所依赖的beans的名称
void: setFactoryBeanName(String): 如果factory bean的名称
void: setFactoryMethodName(String): 设置工厂的方法名
void: setLazyInit(boolean lazyInit): 设置是否延迟初始化
void: setParentName(String): 设置父definition的名称
void: setPrimary(boolean): 设置是否主要的候选bean
void: setScope(String): 设置bean的范围,如:单例,多实例

AnnotatedBeanDefinition

功能
继承了BeanDefinition接口,并添加了对注解元数据访问的方法

方法

1
2
AnnotationMetadata getMetadata(): 获得当前bean definition 的bean 类(class)的注解元数据
MethodMetadata getFactoryMethodMetadata(): 获得当前bean definition 的工厂方法上的元数据

AbstractBeanDefinition、GenericBeanDefinition

功能
BeanDefinition的实现抽象类,GenericBeanDefinition继承自AbstractBeanDefinition

RootBeanDefinition

功能
spring的BeanDefinition有可能会包含parentName属性对应parentBeanDefinition,RootBeanDefinition会和parent的BeanDefinition进行Merge,容器根据RootBeanDefinition实例化对象。

应用

  • 在refresh方法的preInstantiateSingletons()中,将所有的non-lazy-init的单例的BeanDefinition实例化,
  • getType、getBean

    关键代码:getMergedBeanDefinition 将parentBeanDefinition和childBeanDefinition合并。

1
2
3
4
5
6
7
8
9
10
11
12
13
14
15
16
17
18
19
20
21
22
23
24
25
26
27
28
29
30
31
32
33
34
35
36
37
38
39
40
41
42
43
44
45
46
47
48
49
50
51
52
53
54
55
56
57
58
59
60
61
62
63
64
65
66
67
68
69
70
71
72
73
74
75
76
77
78
79
80
81
82
protected RootBeanDefinition getMergedBeanDefinition(
String beanName, BeanDefinition bd, @Nullable BeanDefinition containingBd)
throws BeanDefinitionStoreException {

synchronized (this.mergedBeanDefinitions) {
RootBeanDefinition mbd = null;
RootBeanDefinition previous = null;

// Check with full lock now in order to enforce the same merged instance.
if (containingBd == null) {
mbd = this.mergedBeanDefinitions.get(beanName);
}

if (mbd == null || mbd.stale) {
previous = mbd;
//没有parentBean,直接clone或者create
if (bd.getParentName() == null) {
// Use copy of given root bean definition.
if (bd instanceof RootBeanDefinition) {
mbd = ((RootBeanDefinition) bd).cloneBeanDefinition();
}
else {
mbd = new RootBeanDefinition(bd);
}
}
else {
// Child bean definition: needs to be merged with parent.
//获取parentBean
BeanDefinition pbd;
try {
String parentBeanName = transformedBeanName(bd.getParentName());
if (!beanName.equals(parentBeanName)) {
//beanName和parentBeanName不相等,后去parentBean
pbd = getMergedBeanDefinition(parentBeanName);
}
else {
//如果相等,parentFactory是ConfigurableBeanFactory,merge(这里本质上是递归的方式,知道所有的parent都merge)
BeanFactory parent = getParentBeanFactory();
if (parent instanceof ConfigurableBeanFactory) {
pbd = ((ConfigurableBeanFactory) parent).getMergedBeanDefinition(parentBeanName);
}
else {
throw new NoSuchBeanDefinitionException(parentBeanName,
"Parent name '" + parentBeanName + "' is equal to bean name '" + beanName +
"': cannot be resolved without an AbstractBeanFactory parent");
}
}
}
catch (NoSuchBeanDefinitionException ex) {
throw new BeanDefinitionStoreException(bd.getResourceDescription(), beanName,
"Could not resolve parent bean definition '" + bd.getParentName() + "'", ex);
}
// Deep copy with overridden values.
mbd = new RootBeanDefinition(pbd);//创建parent的Root
mbd.overrideFrom(bd);//merage
}

// Set default singleton scope, if not configured before.
if (!StringUtils.hasLength(mbd.getScope())) {
mbd.setScope(SCOPE_SINGLETON);
}

// A bean contained in a non-singleton bean cannot be a singleton itself.
// Let's correct this on the fly here, since this might be the result of
// parent-child merging for the outer bean, in which case the original inner bean
// definition will not have inherited the merged outer bean's singleton status.
if (containingBd != null && !containingBd.isSingleton() && mbd.isSingleton()) {
mbd.setScope(containingBd.getScope());
}

// Cache the merged bean definition for the time being
// (it might still get re-merged later on in order to pick up metadata changes)
if (containingBd == null && isCacheBeanMetadata()) {
this.mergedBeanDefinitions.put(beanName, mbd);
}
}
if (previous != null) {
copyRelevantMergedBeanDefinitionCaches(previous, mbd);
}
return mbd;
}
}

Spring源码-Bean的生命周期

Posted on 2019-12-26 | Edited on 2022-09-21 | In java , spring , 源码

Spring容器中一个bean的生命周期如下:

Bean初始化前

BeanFactoryPostProcessor–>postProcessBeanFactory方法:针对的是BeanFactroy,在BeanFactroy的refresh方法中的invokeBeanFactoryPostProcessors中这一步。

作用:可以获取BeanDefiniton并且赋予一些属性初始值。

Bean初始化过程

构造方法

BeanNameAware–>setBeanName方法:实现BeanNameAware接口,将BeanName传给Bean,在initializeBean过程中调用
作用:Bean可以获取BeanName

ApplicationContextAware–>setApplicationContext方法:实现ApplicationContextAware接口,将ApplicationContext传给Bean,在prepareBeanFactory过程中将ApplicationContextAwareProcessor加到beanFactory,在initializeBean方法中调用postProcessBeforeInitialization
作用:Bean可以获取ApplicationContext

BeanPostProcessor–>postProcessBeforeInitialization方法:不同于BeanFactoryPostProcessor的是,这里针对的是Bean对象本身,在initializeBean方法中的applyBeanPostProcessorsBeforeInitialization方法调用
作用:针对特定的bean可以修改bean的属性等

@PostConstruct方法:通过注解@PostConstruct执行的方法,在构造函数后面执行。

InitializingBean–>afterPropertiesSet方法:实现InitializingBean接口,在initializeBean方法中调用

BeanPostProcessor–>postProcessAfterInitialization方法:初始化Bean之后执行

DisposableBean–>destroy方法:bean的销毁方法,在容器被销毁时候回被调用
作用:执行bean的清理工作等。

演示代码如下,请分别创建如下的文件。自行修改basePackages

1
2
3
4
5
6
7
8
9
10
11
12
13
14
15
16
17
18
19
20
21
22
23
24
25
26
27
28
29
30
31
32
33
34
35
36
37
38
39
40
41
42
43
44
45
46
47
48
49
50
51
52
53
54
55
56
57
58
59
60
61
62
63
64
65
66
67
68
69
70
71
72
73
74
75
76
77
78
79
80
81
82
83
84
85
86
87
88
//测试类
@Component
public class TestObjImpl implements InitializingBean, DisposableBean, BeanNameAware, ApplicationContextAware {

private String beanName="";
private ApplicationContext applicationContext;

@Autowired
private TestObjImplWithOutAnnoation testObjImplWithOutAnnoation;


public TestObjImpl() {
System.out.println("构造方法");
}

@PostConstruct
public void init() {
System.out.println("@PostConstruct方法");
}

@Override
public void setBeanName(String name) {
System.out.println("BeanNameAware-->setBeanName 方法");
this.beanName = name;
}

@Override
public void afterPropertiesSet() throws Exception {
System.out.println("InitializingBean-->afterPropertiesSet 方法");
}

@Override
public void setApplicationContext(ApplicationContext applicationContext) throws BeansException {
System.out.println("ApplicationContextAware-->setApplicationContext 方法");
this.applicationContext=applicationContext;
}

@Override
public void destroy() throws Exception {
System.out.println("DisposableBean-->destroy 方法");
}

@Override
public void hello() {
System.out.println(beanName+" say hello");
}
}

//BeanPostProcessor
@Component
public class MyBeanPostProcessor implements BeanPostProcessor {
@Override
public Object postProcessBeforeInitialization(Object bean, String beanName) throws BeansException {
if (bean instanceof TestObjImpl) {
System.out.println("BeanPostProcessor-->postProcessBeforeInitialization==="+beanName);
}
return bean;
}

@Override
public Object postProcessAfterInitialization(Object bean, String beanName) throws BeansException {
if (bean instanceof TestObjImpl) {
System.out.println("BeanPostProcessor-->postProcessAfterInitialization ==="+beanName);
}
return bean;
}
}

//BeanFactoryPostProcessor
@Component
public class TestBeanFactoryPostProcessor implements BeanFactoryPostProcessor {
@Override
public void postProcessBeanFactory(ConfigurableListableBeanFactory beanFactory) throws BeansException {
System.out.println("BeanFactoryPostProcessor-->postProcessBeanFactory 方法");
}
}


//main
public class Starter {

public static void main(String[] args) {
AnnotationConfigApplicationContext applicationContext= new AnnotationConfigApplicationContext("basePackages 需要自行修改");
TestObj obj=applicationContext.getBean(TestObj.class);
obj.hello();
applicationContext.close();
}
}

Spring源码-BeanDefinitionRegistryPostProcessor

Posted on 2019-12-25 | Edited on 2022-09-21 | In java , spring , 源码

作用:用于动态的生成BeanDefinition,因为无论是xml还是注解都是通过配置静态的生成BeanDefinition并且注册到容器中。我们可以通过实现BeanDefinitionRegistryPostProcessor接口来动态的生成、注册Bean。
原理:

  • 实现BeanDefinitionRegistryPostProcessor接口,并且注入到容器中;
  • 执行过程:在ApplicationContext的Refresh()方法中,会调用invokeBeanFactoryPostProcessors方法会调用容器中所有实现了BeanDefinitionRegistryPostProcessor接口的类的postProcessBeanDefinitionRegistry方法,在该方法中我们可以动态的创建、注册bean见下面的代码

    1
    2
    3
    4
    5
    6
    7
    8
    9
    10
    11
    12
    13
     @Component
    public class RegistryDemo implements BeanDefinitionRegistryPostProcessor {
    @Override
    public void postProcessBeanDefinitionRegistry(BeanDefinitionRegistry beanDefinitionRegistry) throws BeansException {
    GenericBeanDefinition definition = new GenericBeanDefinition();
    definition.setBeanClass(Demo.class); //设置类
    definition.setScope("singleton"); //设置scope
    definition.setLazyInit(false); //设置是否懒加载
    definition.setAutowireCandidate(true); //设置是否可以被其他对象自动注入
    beanDefinitionRegistry.registerBeanDefinition("demo", definition);
    }
    //省略其他代码
    }

Spring源码-LifecycleProcessor

Posted on 2019-12-24 | Edited on 2022-09-21 | In java , spring , 源码

使用方法

Lifecycle:容器的生命周期回调,容器启动之后运行到某些节点(容器start/stop时候)可以回调Lifecycle子类的方法。比如在容器启动后初始化资源池,在容器停止时候调用资源池销毁的动作

我们实现Lifecycle中接口。注:建议实现SmartLifecycle接口,因为它Lifecycle接口的加强接口,默认实现了stop(Runnable callback),在调用中通过一个CountdownLatch来异步处理stop,SmartLifecycle非常不建议实现stop(Runnable callback)方法

1
2
3
4
5
6
7
8
9
10
11
12
13
14
15
16
17
18
19
20
21
22
23
24
  public interface Lifecycle {
void start();
void stop();
boolean isRunning();
}

public interface Phased {
int getPhase();
}

public interface SmartLifecycle extends Lifecycle, Phased {
default boolean isAutoStartup() {
return true;
}

default void stop(Runnable callback) {
stop();
callback.run();
}

default int getPhase() {
return DEFAULT_PHASE;
}
}

在Lifecycle的基础上实现了onRefresh和onClose接口。参见前面:Spring源码-ApplicationContext文章中finishRefresh中的代码片段。onRefresh会调用Lifecycle实现类的start()方法

1
2
3
4
5
6
7
// Initialize lifecycle processor for this context.
//初始化LifecycleProcessor
initLifecycleProcessor();

// Propagate refresh to lifecycle processor first.
//调用上面的LifecycleProcessor.onRefresh()
getLifecycleProcessor().onRefresh();
1
2
3
4
public interface LifecycleProcessor extends Lifecycle {  
void onRefresh();
void onClose();
}

调用流程

tbd

Spring源码-实现自定义注解

Posted on 2019-12-23 | Edited on 2022-09-21 | In java , spring , 源码

实现自定义的TypeFilter如下,实现match方法

1
2
3
4
5
6
7
8
9
10
11
12
13
14
15
16
@Component
public class MyTypeFilter implements TypeFilter {
@Override
public boolean match(MetadataReader metadataReader, MetadataReaderFactory metadataReaderFactory) throws IOException {
AnnotationMetadata annotationMetadate = metadataReader.getAnnotationMetadata();
//获取当前正在扫描的类的信息
ClassMetadata classMethod = metadataReader.getClassMetadata();
//获取当前类资源
Resource resource = metadataReader.getResource();
String className = classMethod.getClassName();
if(annotationMetadate.getClassName().equals("com.ericliu.spring.scaner.LiuHaoMyAnnotionTest")){
return true;
}
return false;
}
}

在容器启动的类上或者configur类上添加如下注解

1
2
3
@ComponentScan(value = "com.ericliu.spring.**", includeFilters = {
@ComponentScan.Filter(type = FilterType.CUSTOM, classes = {MyTypeFilter.class})
}, useDefaultFilters = true)//这里要写true否则,component等注解都无法使用

容器启动后如果设置了basePackage,在doscan时候回调用isCandidateComponent方法,会调用上面的match的方法如果true会将对应的class生成BeanDefiniton,在注入到容器中

1
2
3
4
5
6
7
8
9
10
11
12
13
14
15
protected boolean isCandidateComponent(MetadataReader metadataReader) throws IOException {
for (TypeFilter tf : this.excludeFilters) {
if (tf.match(metadataReader, getMetadataReaderFactory())) {
return false;
}
}
for (TypeFilter tf : this.includeFilters) {
//typteFilter.match返回true
if (tf.match(metadataReader, getMetadataReaderFactory())) {
//判断condintional是否符合条件,注意里面实现的方法名是shouldSkip这里没有注解或者符合条件返回false
return isConditionMatch(metadataReader);
}
}
return false;
}
1…8910…23

Liu hao

励志当好厨子的程序员

229 posts
54 categories
81 tags
RSS
GitHub E-Mail
© 2018 – 2023 Liu hao
Powered by Hexo v3.9.0
|
Theme – NexT.Pisces v7.0.0